Meg DeForest is a former Community Librarian at EPL.
Are you looking to get started canning? This is your step by step guide on how to get started canning.
There are some things you’ll need to prepare to get started on your canning journey and to successfully complete your first home canning recipe.
What You Need to Get Started
- Clean jars and lids ready to go
- Water bath canner/stock pot filled ¾ with water and heating on the stove
- Apples prepared and stewing on the stove
- Water Bath Canner or Large Stock Pot
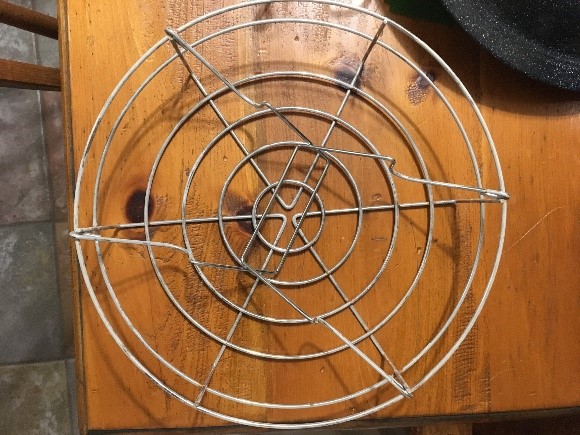
- Wire Rack (that fits bottom of pot – see below) (In a pinch, a kitchen towel will do)
- Ladle
- Heavy bottomed pot with lid
- Measuring cups
-
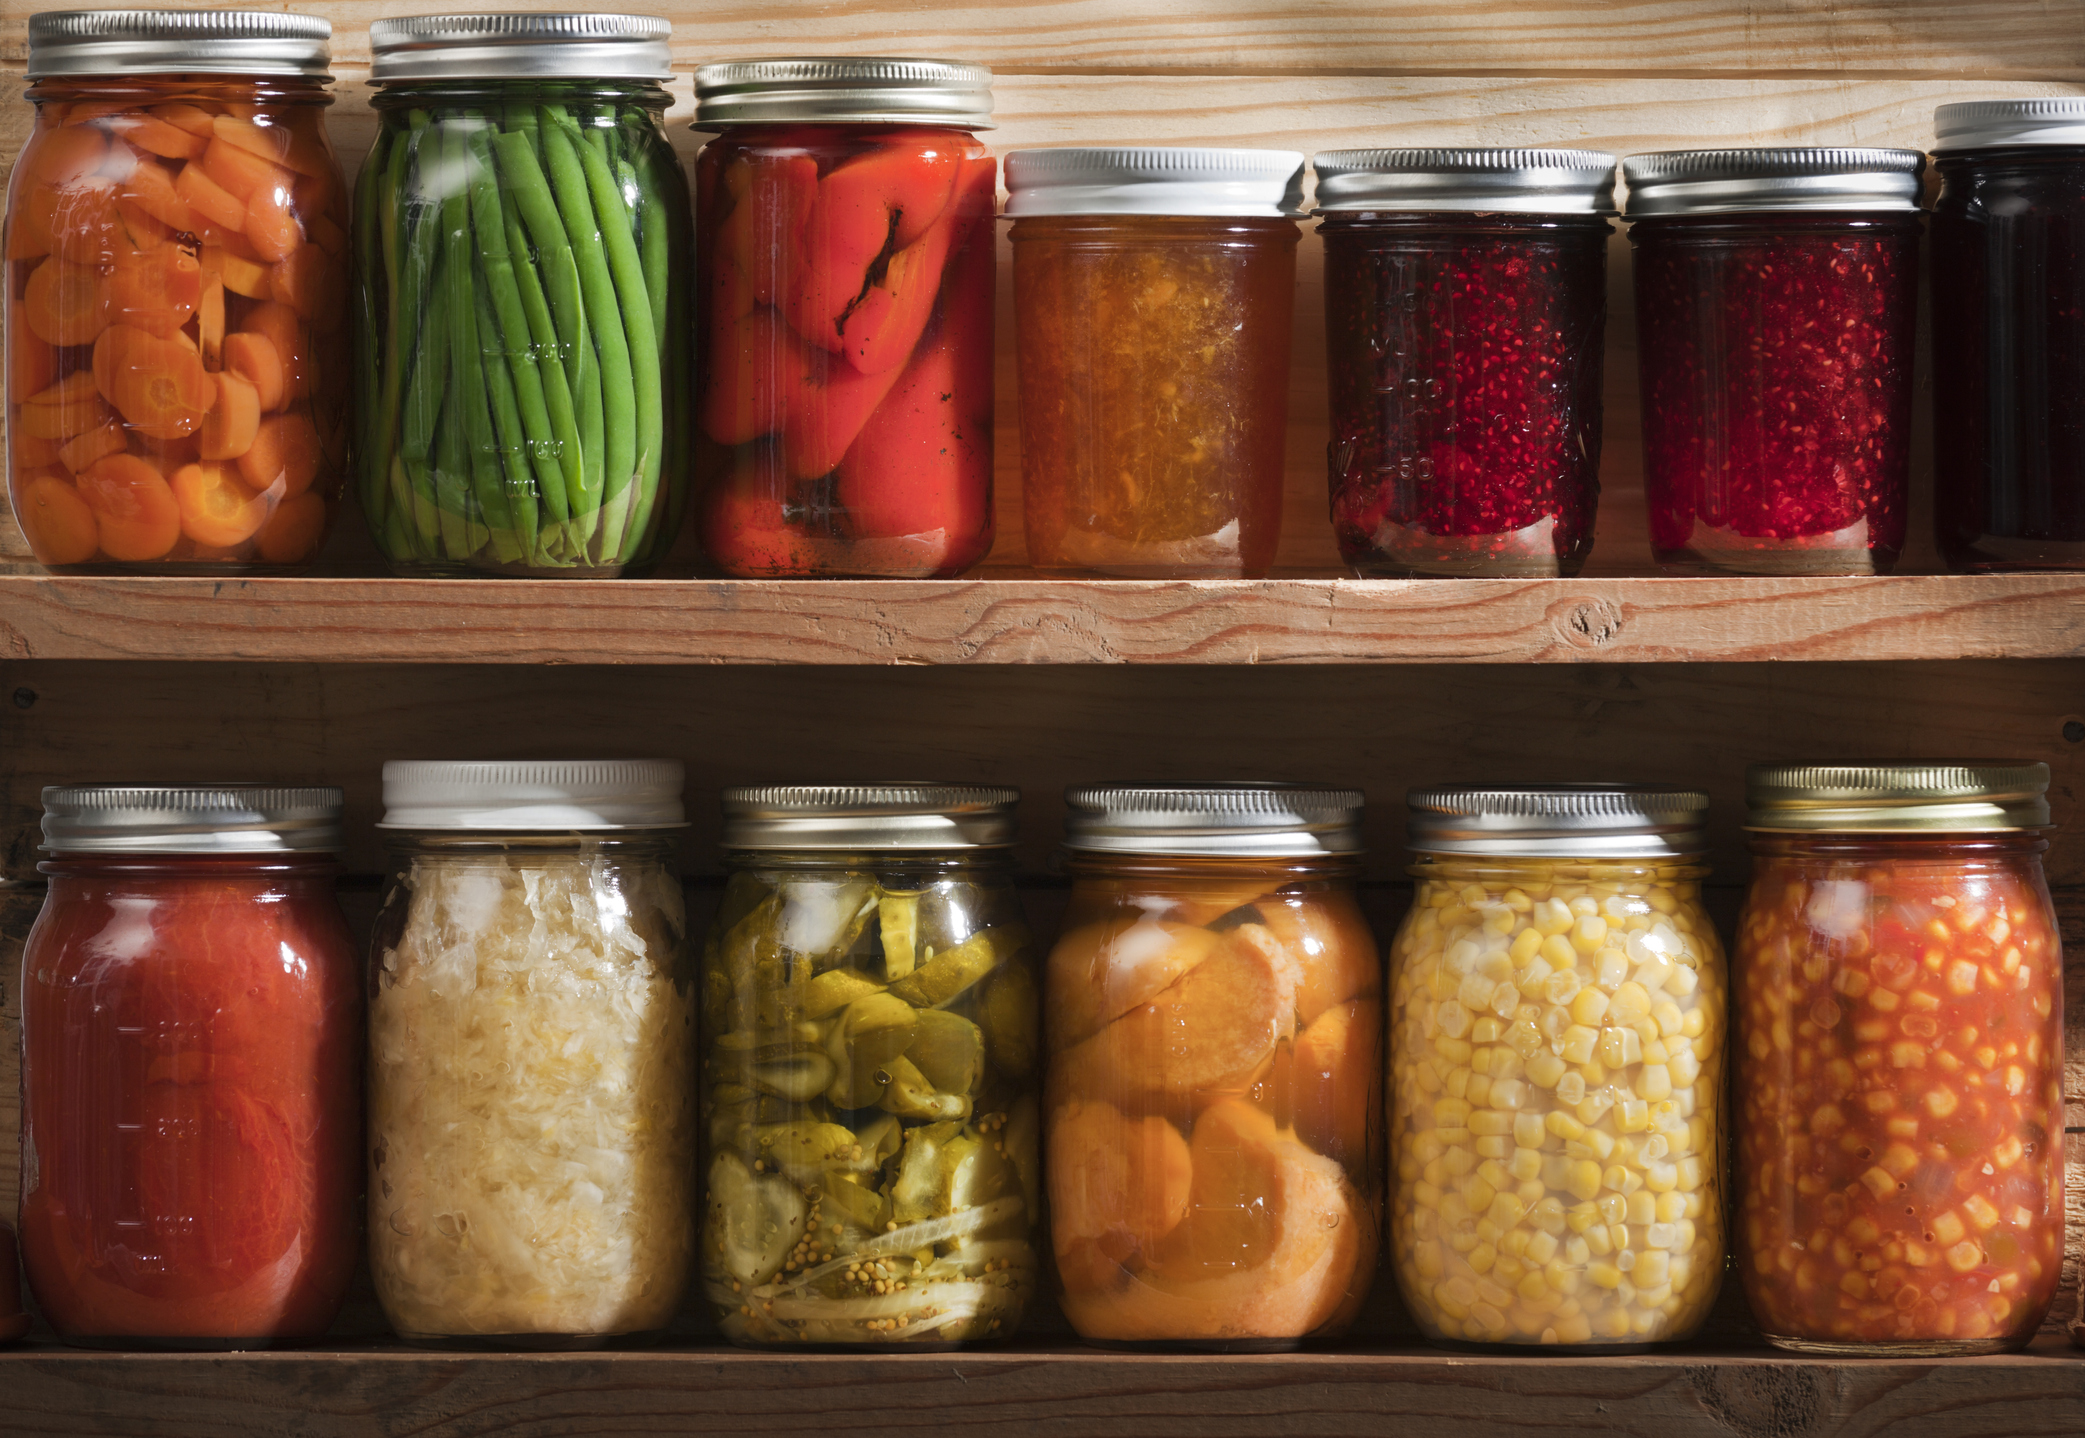
1 dozen canning jars in good condition (no cracks or chips)
- You can easily find these second-hand, in a family member’s attic, or in any major department and grocery store. While any size will technically work, it is best to go with the size recommended by the recipe you are using (for safety and practical reasons – your jars need to fit in your canning pot!). For apple sauce I like to use 125- and 250-ml jars, as those are typical serving sizes.
-
Canning jar sealing lids
- There are many modern brands, such as Ball and Bernardin, that make self-sealing lids in Standard, Wide, and Gem mouth sizes. The brand doesn’t matter, but make sure your lids match the mouth of your jars! NOTE: you CANNOT re-use sealing lids, or the old ‘rubber band’ sealers with glass lids as these are deemed unsafe by the USDA. You must use new lids for every canning batch.
-
Canning jar lid rings
- As with sealing lids, there are various brands – the brand does not need to match, but the size does! You can re-use lid rings as long as they are in good condition (i.e. screws on and off the jar smoothly
Equipment to Make Your Life Easier
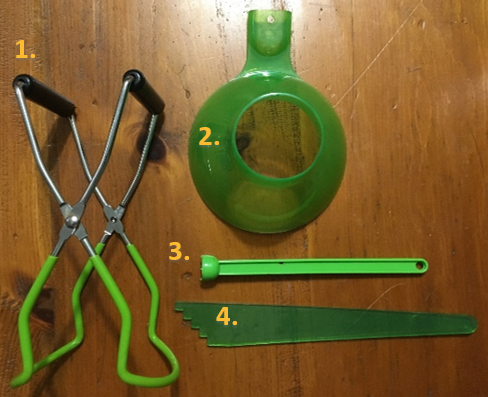
- Jar lifter
- Funnel
- Lid lifter (magnet on a stick)
-
Headspace tool (fancy ruler)
- Kitchen scale
- Blender (An immersion stick blender is my preference for canning recipes)
- Apple corer
- Cherry pitter (Your wrists will thank you if you ever need to pit 8 lbs of cherries for a recipe….)
Now that you’ve got yourself set-up. Here is the recipe we’ll be making for this session. To be ready to participate fully in the session, please complete up to step 4 (apples have been stewed/mashed) before the session begins (or at least have the apples stewing). We recommend having your water bath canner/stock pot full of water and heating up (this can sometimes take up to an hour to get to a roiling boil).
Easy Apple Sauce
Customizable and sugar-free!
Yield: 6 x 125 ml jars
Prep time: 15-30 minutes
Total time: 55 minutes
Ingredients
- Apples (3 lbs)
- Ground cinnamon (2 pinches)
Directions
- Core and chop apples, keeping peels on.
- Place into a pot with an inch of water and turn to medium-high until water is boiling, then lower heat and let simmer.
- Once soft, use an immersion blender to pulp (or masher if you like chunky sauce). Add cinnamon, stir.
- Keep on low heat until ready to can. (This is where you can stop if you are joining us for our live session. We'll do the rest together.)
- Fill jars, leaving ¼ inch headspace.
- Remove air bubbles, using a long toothpick or skewer (do not use a metal utensil for this)
- Place lids and lid rings.
- Process for 25 minutes in boiling water.
- Remove and let stand for 24 hours.
- Store in a dark, cool place. Sealed jars will last up to 2 years.
If you want to make any changes for next time now’s a good time to jot them down, otherwise the details will be lost to the mists of time!
This method is known as boiling water bath canning, which is recommended for foods with a pH of 4.6 or lower: fruit jams, fruit jellies, chutneys, relishes, pickles and tomatoes with adequate acidity from added lemon juice, vinegar or citric acid. For low acid foods (meat, vegetables, dairy) you must use a pressure canner – which is not covered in this blog.
The Science Behind it All
- The high heat of the boiling water kills any potential bacteria, mold, or yeast. The heat also causes expansion of the contents, driving out the air. As it cools the contents contract, sucking in the seal and protecting against any new contaminants.
- Always use cu, opens a new windowrrent , opens a new windowcanning guidelines, opens a new window approved by your government food and safety board or the National Center for Home Preservation and recipes from a trusted source.
- The sugar and vinegar/lemon juice content in recipes is part of the preservative magic of canning - you should not adjust these unless you are intentionally experimenting and have some experience in canning (look up Pomona’s Pectin if you need to find sugar-free alternatives). Always use bottled lemon juice and vinegar.
- Jars need to be clean, but not necessarily sterilized. You can reuse jars (though you need to inspect them for cracks) and lid rings that are not rusted or dented, but you do need new lids each time.
- Clear a storage space for your canned goods - preferably cool and dark. A pantry cupboard, cellar, or even the bottom of your closet works well - as long as it’s below 95° F.
If you aren’t making our apple recipe but want to can something else the general canning procedure is:
Pre-Canning Steps:
- Fill water bath canner (covered) and set to boil with wire rack in bottom.
- Place jars into the dish washer and put on a normal or sanitize cycle - use recommended jar sizes from recipe.
- Put 2 cups of water in the kettle to boil.
- Prepare recipe according to instructions.
Once you are ready and the water bath canner is boiling:
- Fill jars.
- Check headspace.
- Remove air bubbles.
- Wipe jar rims.
- Screw on lids.
- Place the jars on the wire rack, lower jars into canner. Replace lid, start timer.
- After timer rings, remove lid, turn off heat, and let stand another 5 minutes.
- Remove jars from canner using jar lifter and place on counter covered with a tea towel.
- Let stand for 24 hours, check seal. Store in a cool, dark place. Consume within the time recommended from the recipe (usually within 1 - 2 years).
What if Something Goes Wrong!?!
Did it seal? - Sealed jars stay concave when pressed (they do not make a ‘clicking’ or ‘popping’ sound). If you are still unsure, you can unscrew the lid rings and carefully pick the jar up by the lid - it should hold. Properly sealed jars from water bath canning cannot be removed by your hands - use a butter knife. If it didn’t seal, replace with a new lid and reprocess or put in the fridge and consume within a few weeks.
Some contents leaked out - do I need to start again? - This can happen if your headspace measurement is off. Check the seal - if it is good, you can store your canned goods as normal.
There are bubbles in the jar - Sometimes the air from the headspace portion gets forced downwards during the sealing process, or you missed a few bubbles before putting the jar in the canner. Again, as long the seal is good the contents should be fine.
What about botulism? - According to the CDC, botulinum toxin cannot be seen, smelled, or tasted. Do not eat anything from a jar that is leaking, bulging, or swollen; damaged, cracked, or abnormal; spurts liquid or foam when opened; or the food is discolored, moldy, or smells bad. When in doubt throw it out, do not taste!
Additional Resources:
- Replay of EPL's Sustainable Kitchen Canning class, opens a new window
- Blue Flame Kitchen, opens a new window
- National Center for Home Food Preservation
- USDA Complete Guide to Home Canning
Canning is Easy, What Can I Try Next?
- Check out our Home Canner’s Guide to Basic Canning for recommended recipe books!
- Amy Bronee, “The Canning Kitchen: 101 Simple Small Batch Recipes”
- PickYourOwn.org
- National Center for Home Food Preservation
- USDA Complete Guide to Home Canning

Add a comment to: Canning: Yes, You CAN!